It's amazing to see progress on a project that hasn't been touched in years - you realize that all you had to do was start. Enter Orange Peel. Once I got myself organized and cut the remaining cream squares that I needed and then set up a system for assembling the blocks, everything seemed to fall into place. You just have to start.
So I'm going in circles these days, making the circular 'sandwiches' with the batting, the four patches and the cream blocks.
So some piles are getting smaller and some are getting taller.
It's tempting to start trimming them but I'm going to try and finish this step before I move along to the the next. The trimming and turning will be a good thing to do while I'm watching TV. Then they need to be pressed, top stitched, and finally assembled. Lots of steps to this one, but because it's quilt-as-you-go it will be a finished quilt when the last circle is added - not even a binding to fuss about.
I've run out of batting squares so it's time to cut more of those before I can do anything else....M
Showing posts with label quilt-as-you-go. Show all posts
Saturday, March 18, 2017
Friday, March 03, 2017
Blowing The Dust Off
My stash sits organized by colour (actually, 'organized' is a very generous description) in open cubbies in a couple of units that fit across one wall of my sewing room. Mixed in with it are a few spots where batting trimmings, backings and WIPs reside, so there are a few projects that I see every time I sit down at the machine. I see them but they don't seem to be feelin' the love much, so I plucked one out to work on. It seems it's time has come.
The pattern is called either Orange Peel or Cathedral Windows. It's a quilt-as-you-go project that I started 7 or 8 years ago (that's my best carbon dating guesstimate). I saw a beautiful version of it at a local quilt show and was intrigued, so a friend arranged for the maker to do a small workshop for me and five friends Things came to a standstill shortly thereafter because I wasn't happy with the top-stitching that I was doing so it was shelved until I got a new machine.
Well, my new machine has been here for several years now so it's time to try again. Everything for the project was in one place - except the instructions - so I've been looking at all the bits & pieces and had decided to take a stab at making it without them, but not before checking my files one more time.
Victory! I found them!! They have confirmed the basic process for me and also contained a few extra helpful hints, so now it's time to get serious about putting it together....M
The pattern is called either Orange Peel or Cathedral Windows. It's a quilt-as-you-go project that I started 7 or 8 years ago (that's my best carbon dating guesstimate). I saw a beautiful version of it at a local quilt show and was intrigued, so a friend arranged for the maker to do a small workshop for me and five friends Things came to a standstill shortly thereafter because I wasn't happy with the top-stitching that I was doing so it was shelved until I got a new machine.
Well, my new machine has been here for several years now so it's time to try again. Everything for the project was in one place - except the instructions - so I've been looking at all the bits & pieces and had decided to take a stab at making it without them, but not before checking my files one more time.
Victory! I found them!! They have confirmed the basic process for me and also contained a few extra helpful hints, so now it's time to get serious about putting it together....M
Labels:
Orange Peel,
quilt-as-you-go
Saturday, August 17, 2013
Pillow Talk
Nothing like a pile of scraps to make your heart sing. Jane had just organized the last of her scraps into one box so I was given free reign to use them and show her how to make a quilt-as-you-go pillow for her love seat on the deck. It didn't take much convincing - what is it about being able to play with someone else's scraps? I discovered half way through the process that she also has several scrap drawers, but I managed to restrain myself and focus on getting something done with the scraps that I had pulled.
There is a pillow at the cottage that I wanted to try and make this one work with and I had a certain look in mind when I started, but as things evolved it was clear that this was having a life of its own. It still proved to be a good match in the end.
Not nearly as much brown/rust as I had imagined, but then that's not a bad thing as I've discovered that brown is Jane's least favourite colour.
I started this one later in the afternoon so there was still a bit to do when we turned out the lights to go to bed. Nothing like waking up to your breakfast and enjoying it right next to your sewing; I didn't even have to get out of my jammies!
Half way through we realized that the pressure foot tension was not as tight as it could have been so not all of the quilting is as straight as I would like it, but it all blended in quite well.
She had a spool of variegated red/green/gold thread that she'd picked up at a garage sale and it was the perfect choice for this project. And this beautiful vintage scrap found a home as well. For the backing she found this absolutely wonderful plaid; she's got about 4 or 5 similar pillows that she'd like to do so she'll have enough of the plaid to do the backs of all of them, if she likes.
Drumroll....So there it is - another QAYG pillow, finished and on the deck, ready to use. It replaces the brown/cream striped covering similar to the pillow on the right. So much more Jane.
When she saw how much fun this is to do she decided to recover the chairs for her table and then create QAYG pillows to match so she pulled a beautiful variety of prints. I didn't get a pic but they will be perfect with the soft green that her cottage is painted in.
Love, love, love the texture that you get with this method....M
There is a pillow at the cottage that I wanted to try and make this one work with and I had a certain look in mind when I started, but as things evolved it was clear that this was having a life of its own. It still proved to be a good match in the end.
Not nearly as much brown/rust as I had imagined, but then that's not a bad thing as I've discovered that brown is Jane's least favourite colour.
I started this one later in the afternoon so there was still a bit to do when we turned out the lights to go to bed. Nothing like waking up to your breakfast and enjoying it right next to your sewing; I didn't even have to get out of my jammies!
Half way through we realized that the pressure foot tension was not as tight as it could have been so not all of the quilting is as straight as I would like it, but it all blended in quite well.
She had a spool of variegated red/green/gold thread that she'd picked up at a garage sale and it was the perfect choice for this project. And this beautiful vintage scrap found a home as well. For the backing she found this absolutely wonderful plaid; she's got about 4 or 5 similar pillows that she'd like to do so she'll have enough of the plaid to do the backs of all of them, if she likes.
Drumroll....So there it is - another QAYG pillow, finished and on the deck, ready to use. It replaces the brown/cream striped covering similar to the pillow on the right. So much more Jane.
When she saw how much fun this is to do she decided to recover the chairs for her table and then create QAYG pillows to match so she pulled a beautiful variety of prints. I didn't get a pic but they will be perfect with the soft green that her cottage is painted in.
Love, love, love the texture that you get with this method....M
Labels:
pillows,
quilt-as-you-go
Wednesday, June 05, 2013
Pillow Problems and a Dancing Pumpkin
My quilt-as-you-go scrappy pillow top is now finished and sewn to a backing but when I stuffed the form the corners were all wonky. After I played with it a little while I took the form out again and realized that it was really poorly filled - there really weren't any corners to it at all. What to do?
I had seen a technique recently where you taper the seam allowance a little more generously into the corners so that they sit better when turned right side out and had done that, but things still were not right. So, I have a bag of fiberfil that I use to stuff my little felt birds with and I tucked a handful of it into each corner. It did the trick and it looks much better now.
So it's all stitched up and on the love seat in our spare room. I started this as a project to give away but I think that I might just keep my first effort. I think that there are 3 other pillow forms the same size in the sewing room so I'll check out their corners before I stuff my next attempt.
I loved this process - it's not that far from how I assemble the journal covers - and the dense machine quilting leaves such a great texture. It's also nice to see a collection of fabrics that you love all in one little place. Happy, happy, happy.
In the midst of my re-stuffing I happened to look out the window and couldn't help but notice a giant pumpkin dancing in the driveway next door. Not giant, giant, but about 4 feet tall...maybe I was channelling the Great Pumpkin by finishing my Pumpkin Patch at Midnight table topper? Turns out the little girls on our street had discovered a discarded Halloween decoration and decided to use it as a costume. It was great watching the little feet dancing merrily at the bottom of this big, orange pumpkin. Interesting to see its careening path as well, since there were no eyeholes cut out :) ...M
I had seen a technique recently where you taper the seam allowance a little more generously into the corners so that they sit better when turned right side out and had done that, but things still were not right. So, I have a bag of fiberfil that I use to stuff my little felt birds with and I tucked a handful of it into each corner. It did the trick and it looks much better now.
So it's all stitched up and on the love seat in our spare room. I started this as a project to give away but I think that I might just keep my first effort. I think that there are 3 other pillow forms the same size in the sewing room so I'll check out their corners before I stuff my next attempt.
I loved this process - it's not that far from how I assemble the journal covers - and the dense machine quilting leaves such a great texture. It's also nice to see a collection of fabrics that you love all in one little place. Happy, happy, happy.
In the midst of my re-stuffing I happened to look out the window and couldn't help but notice a giant pumpkin dancing in the driveway next door. Not giant, giant, but about 4 feet tall...maybe I was channelling the Great Pumpkin by finishing my Pumpkin Patch at Midnight table topper? Turns out the little girls on our street had discovered a discarded Halloween decoration and decided to use it as a costume. It was great watching the little feet dancing merrily at the bottom of this big, orange pumpkin. Interesting to see its careening path as well, since there were no eyeholes cut out :) ...M
Labels:
pillows,
quilt-as-you-go
Wednesday, May 15, 2013
My Learner's Permit
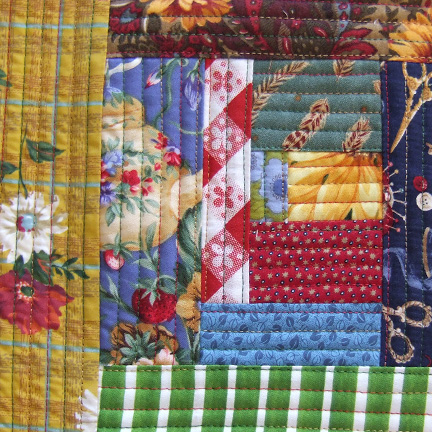
I think I mentioned a few posts back that Pinterest is now my online drug of choice, and that it is totally addictive. Well, nothing has changed on that front except that it did lead me down the path of trying something new - a quilt-as-you-go project. So out came the scraps.
I'm wanting to make several items for the folks who run the gift shop at Madonna House, but am looking for the right combination of effort and result. I recently pinned a few tutorial quilt-as-you-go tutorials and curiosity got the better of me, so I started to play around.
One thing lead to another and before you know it I was making a cushion top. I referred to a couple of tutorials but followed Rachel's most of all. The first step was just to start somewhere, so I did.
She stitched direction onto the batting with no backing but I've stitched everything onto a foundation piece. For some odd reason I had visions of batting getting gummed up in my bobbin mechanism. This way it doesn't get hung up in the feed dogs either.
There's been lots of testing of fabric positions, and lots of changing my mind, which has slowed things down a bit, but I think I'll get better at that with time. Adding the directional rows of stitching really changes the look and feel of everything.
The pillow form that I have is 20", so it's a good size, and I'm thinking that I might make it completely reversible.
To say that I enjoy it is an understatement. I just LOVE the texture. I do think though that it's taking me longer than it needs to decide which colours to lay down next....M
I'm wanting to make several items for the folks who run the gift shop at Madonna House, but am looking for the right combination of effort and result. I recently pinned a few tutorial quilt-as-you-go tutorials and curiosity got the better of me, so I started to play around.
One thing lead to another and before you know it I was making a cushion top. I referred to a couple of tutorials but followed Rachel's most of all. The first step was just to start somewhere, so I did.
She stitched direction onto the batting with no backing but I've stitched everything onto a foundation piece. For some odd reason I had visions of batting getting gummed up in my bobbin mechanism. This way it doesn't get hung up in the feed dogs either.
There's been lots of testing of fabric positions, and lots of changing my mind, which has slowed things down a bit, but I think I'll get better at that with time. Adding the directional rows of stitching really changes the look and feel of everything.
The pillow form that I have is 20", so it's a good size, and I'm thinking that I might make it completely reversible.
To say that I enjoy it is an understatement. I just LOVE the texture. I do think though that it's taking me longer than it needs to decide which colours to lay down next....M
Labels:
pillows,
quilt-as-you-go
Subscribe to:
Posts (Atom)