Tuesday, November 07, 2023
Driving On The Left
Monday, September 21, 2020
The Leaves Are Beginning to Turn
There are lots of different leaf blocks out there but it took a while to find a seven-pointed layout where the tip was pieced rather than foundation pieced (for whatever reason I didn't want to go there). At the end of the day, I decided to draft my own pattern.
I have batiks that I use for journal covers; their rich colours seemed perfect for this project. If you give this block a try, feel free to experiment. I've seen some lovely monochromatic leaves and terrific scrappy ones too.
7.5" Maple Leaf Block Tutorial
For the leaf cut:
(6) 3.5" x 2" rectangles
(1) 2" x 2" squares
(1) leaf tip cut from template
For the stem cut:
(1) 1.25" x 5.5" strip, cut on the bias
For the background cut:
(2) 3.5" x 2" rectangles
(6) 2" x 2" squares
(1) 3.5" x 3.5" square
(1) triangle cut with template
(1) triangle cut with the template reversed
Make the leaf tip and triangle templates:
Draw two 3.5" squares on paper and mark the quarter inch seam allowance on all four sides. Mark the center point of two sides and draw a line from each point to the opposite corner. You will have two identical squares.
This is what the templates look like without the cutaways. The template on the left is for the leaf tip and the triangular template on the right will be used for the leaf tip background. When cutting the background triangles, cut one then flip the pattern piece to cut the reverse.
Make the leaf tip block:
Sew the two background triangles to the leaf tip. Trim to 3.5" square.
Make the stem:
Fold the bias stem strip wrong sides together and sew a narrow seam allowance, about 1/8", the length of the strip. Press, centering the seam down the back of the stem.
Make the leaf:
Draw a diagonal line on the back of the six 2" background squares.
Place one square on each of the six rectangles, right sides together, and stitch along the diagonal line. If you are using three colours for your leaf like I did, create pairs of opposites; if your leaf is scrappy sew the squares randomly.
Assemble in three sections...
and then sew the sections together. Voila! An autumn maple leaf.
I am really happy with how it turned out - love those rich colours. It's going to become a potholder so that I can enjoy the changing leaves year round in my kitchen but I think that I need to make a second block so that I can have a pair. There is talk of a virtual Holly Bazaar craft table this year so maybe a pair or two will find their way there as well....M
Saturday, January 11, 2020
Pretty Points
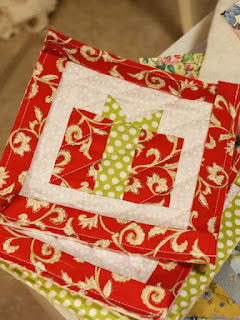
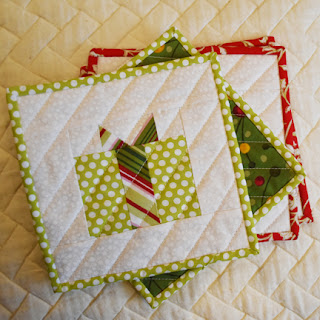
 When I recently bound the gift box potholders some of my corners were neater than the others. I chalked it up to my head cold and a lack of concentration but then I remembered a technique that takes all of the guesswork out of getting nice, crisp corners (I'm blaming the memory loss on the cold as well!) so I used it when finishing up a second batch.
Some leftover binding which had been cut on the grain came in handy to make my blocks as well as to bind them. Those polka dots are really sweet and there's lots of binding left so I'm thinking that there will be more made with dots.
Its a very simple technique - just adding a few stitches at the corners helps keep everything aligned giving you pretty points when you hand stitch it down.
When sewing the raw edges of your binding to the top side of the quilt, as you approach the first corner, stop 1/4" from the end of the quilt, keeping your needle down. Pivot the quilt 45⁰ and then sew about three stitches to the corner; reverse your stitches and cut your thread.
Fold the binding back 45⁰ onto itself along your last stitching line - there's no need for pinning or guessing where that fold line should be.
Then fold the binding down onto the quilt, ensuring that the top fold and the edge of the binding aligning with the top edge of the quilt and the next side, the way you normally do (sorry, I forgot to get a pic).
Starting at the top edge, begin sewing your 1/4" seam (I start in a few stitches from the top edge, reverse my stitches and then continue to avoid bunching up the thread). I will try and get a pic of this step too.
 And that's it. Just those few extra stitches take all of the guesswork out of whether or not you will have nice corners on your binding.
I love these little blocks.
The combinations are endless and tons of fun to consider - hopefully I don't get stuck in gift box pot holder land all year....M
Saturday, March 29, 2014
Pineapple Tidbits How To
Cut 8 1/2" blocks of flannelette. Trace the block onto tracing paper with a transfer pencil being careful to keep the pencil point fairly fine.
With the pencil side face down on the flannelette, iron the pattern onto the blocks being careful not to shift the pattern as you go.
For assembling the blocks it helps to have a light table because you are placing the pieces on the unmarked side of the block and sewing on the lines marked on the other side, so you need to ensure proper coverage; I've just been holding my blocks up to the lamp to position them and it works fine.
Each block begins with a red square and then you apply 4 light and then 4 dark strips in alternating rows, pressing and trimming the points and allowances to 1/4" as you go. It's easier if you add 2 strips opposite each other rather than trying to do all 4 at one time. This is the last two pieces of the second (dark) round; those 4 points will be trimmed even with the seam allowance.
I precut my strips ahead of time and file them in zip lock bags in a shoe box so that I can pull a full set of strips at one time.
Light colours are in 2", 2 1/2", 3 1/4", and 4" lengths; dark colours are 2 1/2", 3 1/4", 4", and 4 1/2" lengths.
When you get to the last round the corner pieces are a little bit chunkier - 2"x 3" blocks rather than 1 1/2" strips.
Once it's all together, trim to a 7 1/2" block and then zig zag the edges to keep everyone in their place until the blocks are joined together.
I think I've got between 35 and 40 blocks together now; this one will be for the sofa so it will soon be ready to start assembling. Because it will be more of a throw than a full quilt I think I'll back it with flannel....M
Tuesday, December 03, 2013
Ask And You Shall Receive
I've been calling it a Log Cabin block but I realized as I was putting this sample together that it's slightly modified. While I should have been working my way around the block with strips I had been adding to the ends and the sides with sets of strips, so it's close, but not quite legit - it's a combination Log Cabin & Courthouse Steps.
I used 1.5" wide strips throughout and started with two 5" lengths, one in yellow and a second of green.
Then I sewed two strips the height of the pieced block (in this case 2.5") - one in red and one in green - to the ends.
From here you just keep adding a strip to each end and then each side, keeping the reds together and the greens together and working your way out until you get a size that you like.
I used a combination of Christmas and traditional prints and tried not to repeat a colour. I also didn't do the math for the strip lengths in advance - each set of strips was cut to fit the block as I went.
My mats ended up with 5 strips of green (both on the end and one side) and 5 strips of red on the other end and side but if you want them larger just add another strip or two. Once it's together, machine quilt to your liking (I just did diagonal line about an inch apart) and then bind them. Easy peasy. If you make some I'd love to see your photos.
And now to the sweet stuff. Susan was interested in the Toblerone Shortbread recipe, so I thought there might be one or two others that would enjoy it as well. They mix up really quickly and are a lovely cookie:
Toblerone Shortbread
1 c unsalted butter, softened
2/3 c icing sugar, sifted
1 1/2 c flour
1/3 c rice flour or cornstarch
1/2 tsp baking powder
pinch of salt
1 c chopped Toblerone chocolate nougat bar
Preheat oven to 325F.
Using electric mixer, beat butter with sugar until light. In separate bowl, combine flour, rice flour, baking powder and salt. Using wooden spoon , gradually stir dry ingredients into butter mixture. Stir in chocolate nougat pieces.
Drop by tablespoonfuls onto parchment lined cookie sheets. Bake about 20 minutes, or until lightly golden around edges. let cool in pan on rack for 5 minutes. Transfer to racks to cool completely. Makes about 30 cookies.
Have a great day....M


