Showing posts with label handy tools. Show all posts

Tuesday, June 11, 2019

The Star of the Show

I have a great little spool holder/thread caddy that shows up in lots of my posts and often becomes the topic of discussion in my comments box, as was the case this past Sunday, so I thought it might be time to give it a little more viz.

This little beauty has been in use for at least 20 years and is barely showing its age. The stamp on the bottom says it was made by Carol Armstrong Quilts in Shingleton, MI. I ordered it from Keepsake Quilting and bought a few for gifts as well. Had I known that the supplier would go out of business I would have bought a ton more because most everyone who sees one wants one. It could have funded my retirement, I'm sure!


It is brilliantly simple and beautifully functional - just the perfect little sewing accessory - and fits a small spool of YLI quilting thread nicely (that's what I like to use for my hand piecing as well as my hand quilting). Did I mention that it is very well made?

A piece of dowel fits through one sidearm, then your spool, and into the other sidearm.

And the little pincushion on one end is just big enough to hold several pins and needles.


Small enough to fit into my 'little black bag' or a project box when I'm travelling, it keeps everything neatly in one place.


thread caddy: QuiltBee
If you know a woodworker they might be able to create a reasonable facsimile; here are a few basic dimensions:

base:  4 5/8" long  x  2 1/2" wide
sidearms:  2" high x  1 7/8" wide
total height at sidearm:  2 5/8" high
dowel to hold spool: 4 1/4" long
base and sidearms:  3/4" thick
If you don't know a carpenter, Barnett's makes one called Thread Magic which includes a thread cutter. This is the same company that I bought Anne's quilting hoop from and she has been more than impressed with its quality.


There's another one called Sew Darn Handy Original Organizer that might suit as well.


And just for old time's sake, anyone that grew up in our household will recognize this model that I found online. Dad was a talented carpenter and could turn his hand to projects large or small so we had a few similar to this in the house.....M

Friday, March 08, 2019

The Plan

Things continue to fall into place with Anne's Carpenter's Star/Moda Love lap quilt, thanks to a little klepto quilting (AKA digging through someone else's stash to find what you need, something our gang does regularly). She stopped by the other day to see if there was anything in my stash that might help round out the blocks that she's sewn and we had great luck finding just what she needed.


We found a great little blue and cream pin dot to use between the randomly placed star blocks - it's just enough to tie in to her fabrics without making a big scene. She's got a few scraps of her prints left so there may yet be the odd tiny Ohio Star added to the mix.

The backing is a piece of white and turquoise  (the fabric on the right - it's really not grey but a nice soft turquoise) and she will bind it with that too. And, just to make things a little more interesting, we found a soft mauve that she will incorporate into a faux flange binding. I think that tiny strip of mauve will be the perfect finishing touch.


And what's this? Christmas in March???

We had ordered a lap hoop for Anne as a Christmas gift but its delivery was somewhat delayed because they are handmade and quite in demand. It didn't seem to matter much that she was only receiving it now - when she saw the box she tore into it like a little girl.


It's beautifully hand crafted and quite ingenious, and I'm thinking well worth the wait. Those six small discs on the centre round are magnets - very strong magnets.


And they connect to this piece...


which then attach to this piece that you use to adjust the angle of the hoop and sit on for stability as you quilt. Quite brilliant. They are made by Barnett's Laptop Hoops and there are any number of configurations to choose from. If you are in the market for a hoop it would be worth a look.

We were so eager to get into the box that I didn't get a pic of the complete setup but will get Anne to send me one that I can share with you. I'm thinking that it is already in use as she virtually skipped to the car with her box 😉....M


Saturday, May 19, 2018

A Happy Spring Giveaway

Lemoyne Star: QuiltBee
The Official Cookie Tester cut the lawn today for the first time this season and that glorious freshly mowed grass fragrance is everywhere. What a wonderful sign of spring and a terrific way to begin our May long weekend. It seemed to set the stage perfectly for a bit of a giveaway.


Rapid Fire Lemoyne Star ruler: QuiltBee
Some time ago Jane and I dropped in on Roberta with a few quilts for her to quilt and had a great visit. We got a peek behind the curtain to see how she works her quilting magic. We also got to see some of the projects she's working on and she sent both of us home with a little gift - the Rapid Fire Lemoyne Star ruler. Apparently she had to buy six at a time (!) but she was so keen to try it out that this didn't prove to be an obstacle so she shared the wealth. Long story short, I came home with two - one for me and one to use as a giveaway, so Cocoa and Quilts is our giveaway sponsor 😊.


There are instructions included with the ruler and I was really impressed with how well things went together.


Not one Y seam to be had!


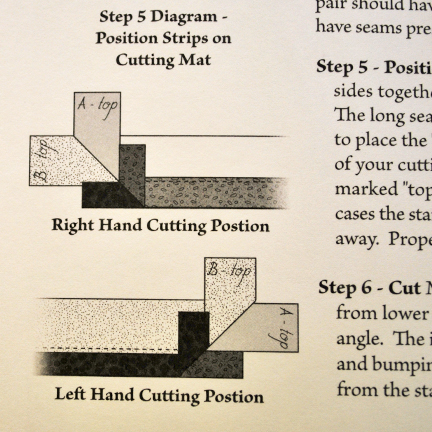
The directions were very well written and, being a leftie, I was happy to see cutting instructions for both right and lefthanders. It took me about an hour from start to finish to make a block, including cutting, but now that I've done it once I know that it would get quicker the more you do.


Lemoyne Star mug rugs: QuiltBee
You can make blocks from 3" to 12" in size. Roberta made about 12 of them at once for mug rugs and is down to about five or six as they make great little gifts. She's thinking that it is probably time to dig the ruler out again and make more, maybe with her Fig Tree stash. They would be gorgeous.


Lemoyne Star: QuiltBee
Mine is an 8" block (I didn't want to start out too small before I knew what I was doing) but I'm thinking that I might make a couple of 7" blocks for potholders for the Holly Bazaar.


scrappy Lemoyne Star: QuiltBee
I've seen this scrappy version on Pinterest which I just adore and would like to see if I could create something similar...


Lemoyne Star quilt block: QuiltBee
and this one that I saw on Craftsy. Drool.

So, if you are keen on the Lemoyne Star block and would like to make this ruler your own, just leave me a comment with what you'd like to make with it; the Official Cookie Tester will draw the winner on May 26. Good luck!....M


p.s. Just to give you a further idea of Roberta's very generous spirit, she recently quilted 20 - yes 20! - quilts for the folks in Humboldt struggling to deal with the aftermath of that fatal bus crash that killed so many of their hockey team. She is part of a small army of quilters worldwide who made and quilted quilts for this effort. They had  hoped to get 200 donated and I believe will have about 1,000 all told. How wonderful.

Thursday, November 30, 2017

A Great Little Stocking Stuffer

If you have a quilter on your Christmas list (or if someone is looking for a great little stocking stuffer for you) you might want to consider a recent find that I just love. I tend to have several spools near my machine and almost as many bobbins, switching them up as I go, but when several weights of white all start looking the same it's a bit of a guessing game as to which bobbin belongs with which spool. These little gizmos have taken all of the guesswork out of it for me.


They are called bobbini, and they easily keep your bobbin matched up with the correct spool of thread.


This was a system that I had tried for a while - just using an elastic to keep the two together, but the bobbinis are even easier.


They are pliable and rubbery so when you push the wide end into the centre of the spool it collapses and stays in place.


Then just slip the bobbin over the nub on the top. I like to slide the end of the thread into the hole in the bobbin as I do this so that there aren't loose threads flying about. Easy peasy, and no more playing 'match game'. I got mine from Connecting Threads but I suspect that Santa might know of other shops where they are available too. Happy shopping!...M

Wednesday, December 28, 2016

Santa Must Sew

There were lots of great quilty gifts under the tree for me this year which can only mean that either Santa sews or he's married to someone who is 😄. These bloc loc flying geese arrived! Soooo happy!! It's been a couple of years now that I've had my eye on them. There are two sizes - 2 x 4" and 1 x 2" - which should make for lots and lots of perfect geese.


This June Taylor Shape Cut Plus ruler has been on my wish list for a while too - it will make short work of cutting several strips at a time, particularly when it's time to cut binding strips. I suspect that I will be able to cut several hexies at once and, given my penchant for sewing tiny squares, I think that this is quickly going to become a favourite. Thank you, Santa! (and Paulette for making me wise to its existence - Stopped Me In My Tracks might get started yet).


For my birthday this past summer I got one of Sue Spargo's books and was lamenting that, beautiful as it was, I would have liked it more if instructions for some of the stitches had been included. Ta Da! Enter Creative Stitching. Sandi put me on to it after reading my post and Santa must have been aware of it too.


It's clearly laid out and the spiral binding ensures that the pages lie nice and flat. Actually, Santa must have lost track when making his lists because two copies arrived; apparently he is open to exchanging it for something else.


He must also be a baker because these tiny autumn leaf cookie cutters were under the tree as well. I particularly like the acorn and look forward to making lots of Thanksgiving pumpkin pie embellishments (it's the little things, isn't it?).

So, I've got lots of great new toys to play with and am now busy trying to figure out what the next projects will be. Fun, fun, fun! Hope Santa filled your stockings with lots of goodies too....M

Thursday, October 08, 2015

It Helps To Know What You're Looking At

I'm in the finishing stages of both Nantucket and Country Charmer so my mind has been skipping ahead to the next project. Jane, you will be happy to know that I think I'm finally ready to tackle the machine quilting on your Pumpkin Patch at Midnight, and you can thank Paulette at Sweet P for that. A short while ago she mentioned finding a 'stitch in the ditch' foot for her Janome and I thought that any little bit of help I could get with my machine quilting would be a bonus, so I was all set to buy one.


Just before bolting out the door I thought maybe I should check and see if maybe it was one of the feet that came with my machine, since it is a quilting model. So, I dumped out this little bag of goodies that had been stashed away, and...


...there it was! Bonus! See the little black guide that drops down into the centre of the foot? That sits in your seam as you sew, ensuring accuracy, and given my paranoia about messing this up it is a welcome little tool. There are lots of other uses for it too, if you are interested (it's often called and edge foot). Guess it would help if I spent a little more timing exploring the details of the toys that came with my machine.


All along I've been thinking that I would free motion quilt this piece but I have never done any before and just have not been comfortable testing out my skills on this piece. Then recently I had a brainwave - maybe I could make the spider web quilting pattern using my walking foot.

I whipped out a little scrap with some batting, drew up a loose web, and in no time had a free form spider web that I was very happy with. Eureka! The blocks are not precise matches so the webs will be a little free form too, and I want to stitch in the ditch the spines of the webs, so all the stars suddenly seem to be aligning....M

Sunday, March 29, 2015

Back in the Garden

Seeing Jane's progress on Danuta's Garden a couple of weekends ago had me picking up mine after a few months of just watching it sit in the basket. I've spent a lot of time at the machine lately so hand sewing the tiny four-patches for the sashing was a lovely, relaxing change.


There are stars all around the border so I've begun working on a few of those as well. I gave Mr. Meerkat (Gustav to his friends) a break and used my little angel to hold a few pins for me.


It's magnetized and has a second magnet so that you can sandwich a garment between the two, so I attach it to my sleeve cuff and I'm good to go. So much faster than having to reach for the pincushion all the time and again, minimal chance of me impaling myself on tiny sharp objects - bonus!....M

Sunday, March 08, 2015

The Choir is Warming Up

The end of February was my target date for finishing the quilting on Confetti, but we're already into the first week of March and it's still on the hoop. That's okay. All of the large triangle patterns are now quilted around the whole quilt (yay!) so it's a matter of filling in between them with one of the smaller squares, figuring out how to quilt the corners, and then this one will be ready to bind. I can almost hear the choir warming up to belt out the Halleluiah Chorus when the last stitch goes into this one!


Yesterday was when I finished making it around the edge and the whole time I was accompanied by my little visitor, Baylea. Truth be known, she snored through most of it, but I'm certain that she was as excited as I was when I finished the fourth side.


And I pressed my new little needle holder into service; so much better than impaling myself on the tip of a needle every little while - a lot less painful and you don't have to worry about bleeding on the quilt! He's quite the distinguished little fellow so I think I'm going to call him Gustav. Gustav Meerkat. That has a nice ring to it. Betty's using hers as well but no word yet on whether she's going to name it or not... :).


Anyway, since I was on a roll, I started in on the smaller squares  that need to be inserted (like the one to the right of the red block) and got one side of the quilt finished.


It's going to look like a nice lacy finish along the edge.

When you find yourself wondering what to bind it with you just know that you're nearing the end. I don't have anything but scraps left from the fabrics in the quilt so I'm hoping that I can find a nice creamy pink or blue gingham, which I think would finish it off nicely bound on the bias.

Back to the hoop...M

Tuesday, January 27, 2015

Tool Time

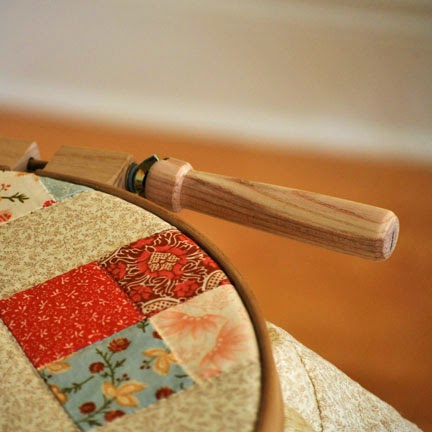
I've had questions about where I bought the handle to tighten my quilting hoop but have been unable to reply because folks are identified as 'no-reply bloggers' so I thought I'd do a quick post about it in case others were interested in looking for one as well.

I had to do a little digging after the question was asked as there are no markings on the tool. Sleuth that I am, I finally found the answer. I got it from Carol Shewan at Willow Creek Rug Hooking. The tighteners are not in her online shop but if you contact her she will be happy to help. If memory serves me correctly, I paid about $5 for it.


It is such a joy to work with so if you use a quilting hoop I would really encourage you to pick one up; your knuckles will thank you. Makes you wonder why someone didn't think of this sooner.


The slot in one end of the handle has a hole drilled into it so it just sits over the screw and the wing nut in your frame and you use it much like a screwdriver.


Thought you'd enjoy a quick peek to what the border quilting pattern looks like from the back. It will need one more little square added to the corner where the two large triangles meet, but I'll do those all at the end.

Also, if you are a no-reply blogger, here's a link to step-by-step instructions for how you can change that so that I am able to reply to your questions - I love getting your comments and this just makes it that much easier to connect....M