While I had great plans to leisurely sit and stitch floral nine patches Sunday afternoon the Official Cookie Tester had others. Monday was the annual big garbage pick-up in the city and he was bound and determined that we'd get into the basement and clear out as much stuff as we could. Normally, a good idea, but not so much when all you want to do is stitch!
Well, down we went and a couple of hours later emerged feeling like we'd done a good purge.
I like this pick-up because it's almost like one massive garage sale where everything is free. Folks are welcome to pick stuff up from the curb before the garbage men do so happily anything that we put out that had a use went to new homes, which is great. We also did a run to Value Village, so all bases were covered.
Needless to say, the stitching didn't start til much later in the day than I had imagined, but start it did and all six blocks came together and have now been added to the pile, so I thought I'd give you a little flower show. There's still some green in the new blocks but it's much more subtle than in the blocks that I culled.
And I ripped apart on of the original blocks so that I could use this turquoise pansy print because I think that it was the last bit of it that I have. The addition of the turquoise and blue fabrics will be great with the other blocks.
Now to return to finishing off the setting triangles for my Candied Hexagons quilt so that I can get it basted and into the frame for hand quilting....M
Tuesday, May 31, 2016
Sunday, May 29, 2016
Weeding Out A Few Greens
I laid out a selection of the nine patches for Danuta's Garden and it didn't take long to figure out that I had much more green in my garden than I'd like. I do have a fondness for green but I saw this one as having a great variety of prints. What to do? A little weeding, of course.
I had picked up a few pieces a couple of weeks ago when I was out for a drive with the Official Cookie Tester so I thought there might be something here that would work.
And then I raided Jane's floral bin when we were at the cottage last weekend (nice guest, aren't I?). Love that little pussy willow print in the bottom right corner.
When all was said and done I didn't use that many of the fabrics that I thought I would, either because of the scale of the pattern or the colour, but I've got the makings of six more. It was beautiful out last evening so I stitched on the deck after dinner and got a good start on them. Today the plan is to get them all into nine patches and move on.....M
Friday, May 27, 2016
Another Spring Garden
Remember my Spring Garden quilt that I made a couple of years ago? Yes, the one that has yet to be quilted... Well, despite its state of limbo it has served as inspiration for Anne to make one of her own.
She started work on it over the winter and is going gangbusters, to the point that she will probably be using hers before I am mine :).
Her big dilemma was the border fabric. She really liked the blue floral that I had used but we couldn't find it anywhere (double bummer because I would have liked to use it for my backing). So, on to Plan B. That great green print that you see in the bottom corner of the top image was in the sale bin in the Hancock's of Paducah's online store so she bought enough of it for the border and the backing and binding, and I think that it's ideal. It's playful and a nice complement to the patchiness of the pattern.
She's had it laid out in rows just waiting for the border fabric and it sounds like with lots of help from Jane over the holiday weekend she's made even more progress. I'm anxious to see how much it has come together and how it looks as the border gets added.
BTW, if by chance you happen to know where I can get my hands on five or six yards of that blue (it's from the California Girl line by Fig Tree) I would be forever indebted....M
Tuesday, May 24, 2016
Three Batches of Four
We just enjoyed a gorgeous May long weekend so it gave me time to keep working on the Maple Leaf blocks for Fort Mac and I've finished off a dozen blocks to send them.
It would have been faster if I had made them all with the same two fabrics but I really liked the idea of scrappy so the extra cutting time was worth it. And the more reds I added the better they got. The first block that I made is from only two fabrics, all the rest are scrappy.
I had four done early on so once everything was cut and the HSTs made and trimmed for the last eight it only took me an hour to sew all eight together.
A couple of weeks ago I broke the needle in my machine and I think that my bobbin casing needs to be adjusted because I can hear a slight rubbing of metal on metal when I sew. I decided that it wasn't serious enough to stop me from sewing these blocks but now I think I'd better have it looked at before I do some harm.
I'll get the blocks to Anne so that she can drop them off when she goes to Stittsville in the next week or so and then the Guild can work their magic.....M
Friday, May 20, 2016
Quilts For Fort Mac
Seeing the devastation from the wildfires that have ravaged Fort McMurray, Alberta it has been hard to comprehend what people there are going through. More than 10% of the city burned to the ground and the 80,000+ people that have been evacuated are now desperately trying to cope with this incredible loss and imagine rebuilding their lives and their community. Assuming that the fires remain contained and local infrastructure repaired, they are looking to return home in early June, roughly a month after their sudden exodus. It breaks your heart. So when Dori's note about the efforts of the Ottawa Modern Quilt Guild arrived it was the perfect chance to pitch in and help, even if just a little bit.
Stacey is collecting Maple Leaf quilt blocks to make quilts to send to those who have lost their homes and would be grateful for blocks that you might be able to contribute too. Here's the details:
Quilts for Fort McMurray
c/o Mad About Patchwork
2477 Huntley Road
Stittsville ON, K2S 1B8
CANADA
If you are in the Ottawa area, you can drop blocks off in person at Mad About Patchwork.
Other ways to help:
I used the All Patched Up tutorial and three patchwork leaf blocks came together in short order. The makings of more are on the sewing room table and I plan to have at least six to send along, hopefully more....M
Stacey is collecting Maple Leaf quilt blocks to make quilts to send to those who have lost their homes and would be grateful for blocks that you might be able to contribute too. Here's the details:
- 12.5″ square Maple Leaf quilt blocks (unfinished so they finish at 12″)
- Colours can include blue, yellow, green, red and white but two-colour blocks are preferred (i.e., use two of these colours in combination, like blue/yellow); any mix of print or solid fabrics are fine
- Use any Maple Leaf pattern you’d like, or make an improvised leaf block - it’s up to you. Here are a few 12.5″ block tutorials:
Quilts for Fort McMurray
c/o Mad About Patchwork
2477 Huntley Road
Stittsville ON, K2S 1B8
CANADA
If you are in the Ottawa area, you can drop blocks off in person at Mad About Patchwork.
Other ways to help:
- If you have finished quilts that you would like to donate, you can get in touch with the Quilts for Fort McMurray Facebook group, or check out the places collecting quilts on Cheryl Arkinson's blog,
- Consider donating to the Canadian Red Cross which is responding to this emergency. Text REDCROSS to 30333 to make a donation.
I used the All Patched Up tutorial and three patchwork leaf blocks came together in short order. The makings of more are on the sewing room table and I plan to have at least six to send along, hopefully more....M
Wednesday, May 18, 2016
Dipping Into The Candy Dish
I dug into a shopping bag that's been moving around the house lately, deciding that it was time to play with larger hexies, specifically the setting triangles for the borders of my Candied Hexagons. This one has been languishing for about two years now and I'd like to hand quilt it, so just like that it has moved to the top of the list.
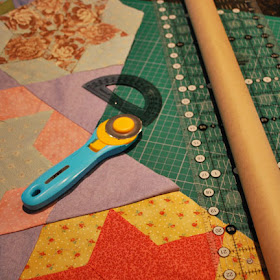
All the tools and my grade 10 math skills came into play. When's the last time you used a protractor???
The end result is an incredibly elongated triangle, almost 21" long. The setting triangles for the top and bottom edges are the same mauve as the triangles that separate the hexies throughout the quilt top so I just needed to worry about the pieces for the sides and corners.
During the Boxing Day sales this past January I picked up this fabulous pink piece of Art Gallery fabric. I just love it. There is something about it that really reminds me of my Grandma Coulas - not sure what, but it keeps talking to me.
If you've never felt an Art Gallery fabric I highly recommend seeking one out just so that you can pet it for a bit. Sooooo wonderful! And a dream to stitch with, especially if you are hand sewing. There are 10 triangles and four corners to add and I'm hoping that they don't take as long to finish as it took for me to pick this one up again! ....M
Sunday, May 15, 2016
MMMMM Minnie
Minnie seems to be my go-to project when I need a little inspiration and today was no exception. I sat down to watch some golf from The Players on TV and cleaned up several hexie diamonds that had been in progress, but my very first task was a bit of a scavenger hunt.
This diamond has been sitting near my chair for I don't know how long missing one last hexie. I was convinced that I didn't have any more pink hexies to finish it off and I knew that I didn't have any more of that fabric, so I was toying with taking the last round off and redoing it, but not before one last search. Eureka! I actually found three, which makes me think that they had been set aside for another diamond. I wasted no time sewing it in place only to realize that I needed another one for the tip of the diamond, so another one found a home too.
I pressed five diamonds that I had finished off and then found two more diamonds that needed a little work, so they got finished too.
It was nice to see something coming together, finally.
Here's one where I didn't have three of the same fabric so I used a slightly different one for the centre - it still works. (Recognize your scraps, Jane?)
And the Official Cookie Tester has been asking for a butterscotch pie so I made one of those the other day too. Finally, some productivity!....M
Friday, May 13, 2016
Quilter's Code
There's been lots going on here but none of it quilting - I'm still waiting for that lightning bolt of inspiration to zap me - so I thought I'd share an amusing Pin that my friend Jane sent along. I've come across a few of these codes before but there's lots here that are new to me. I love PIG! It reminds me of a blog post once entitled 'Because Friends Don't Let Friends Knit Out Of Plastic Bags' that shared a pattern for a lovely fabric basket. I think of it often, and of how nice it was for that gal to be so concerned for her friend's knitting experience :).
It has also occurred to me in looking at the list that I'm probably much more educated than I ever imagined because I appear to have multiple PHDs. Any other PHDs out there?....M
Thursday, May 05, 2016
Danuta's Garden Sew Along
Over the last little while I've been asked by a few people if I would do a sew along for Danuta's Garden. Now I have to admit that I'm a total rookie when it comes to sew alongs - I've never participated in one let alone hosted one, primarily because I don't know what they are. But last week, thanks to Paulette, I discovered that Kaaren at The Painted Quilt was going to host one so I skulked over to her blog to see exactly what that might entail.
Kaaren provided a PDF of detailed instructions for how to sew a beautiful checkerboard quilt and then illustrated the steps with photos (I am soooo tempted...). She has also given rough fabric requirements. Mystery solved! So, here's my version of Danuta's Garden (aka The Civil War Quilt) given that the pattern is no longer available for purchase. There are no assembly illustrations but the blocks are very straightforward so hopefully the photos suffice and all of the essential details are covered.
Because I created the pattern from a photo and because I am making a scrappy version, the background fabric is the one that you will need the most of - I'm thinking maybe 4 metres. For the Four Patches, Nine Patches and Ohio Star blocks pull together a good mix of fat quarters - I'd say between 20 to 30. For the Four Patches I also raided my stash and scraps so there would be lots of variety.
I've mentioned before that, with the exception of the background, I started with the leftovers from the first version that I made with mom over 15 years ago and then added to that, focusing on floral prints, but you can choose whatever suits. My friend Linda is making hers in a gorgeous collection of soft blues, yellows and pinks.
Linda's sister Jane made her second version using Kaffe Fasset prints and called it Summer Frolic. I'll see if I can get a pic of the first one that she made - it's done in a green palette and equally beautiful.
For some reason when we made the first version we didn't go with a basic 3.5" block for the Nine Patches - my blocks are 3 1/8" so the Nine Patches and Ohio Stars are 8 3/8" unfinished. Feel free to use whatever size works for you but be prepared then to figure out the math for the pieces needed for the sashing strips. Also, I am using Ohio Star blocks for my corners instead of four different blocks as shown in the original pattern.
There are five basic blocks/pieces:
42 Nine Patches
- cut 9 squares 3 1/8" x 3 1/8", five in one colour and four in another; 378 3 1/8" squares in total
30 Ohio Stars
- cut four squares 3 1/8" x 3 1/8" from the background fabric for and corners of each block
- cut one square 3 1/8" x 3 1/8" from your second print
- for the star points, cut four 2 7/8" squares from your second print and cut them again on the diagonal to create eight triangles; make four 3 1/8" Hourglass units
30 Solid Sashing Strips for between the stars (8 3/8" x 3" unfinished)
347 Four Patches made from 1 3/8" squares (cut 1,388 squares 1 3/8" x 1 3/8")
Use the Four Patches to assemble two different lengths of sashing:
- 48 short sashing strips made from three Four Patches and four corner triangles, and
- 7 long sashing strips made from 29 Four Patches and four corner triangles
402 Setting and Corner triangles
- cut 2 7/8" squares from the background fabric and cut those on the diagonal; the corners are slightly larger than need be but will give you room to trim
So that's it. I'm not at the point yet where I am assembling blocks and sashing, but as I get there I'll gladly share pics for you. Also, because I am sewing this by hand I have a scant ¼” seam allowance so if you are sewing this on a machine you may want to do a set of test blocks to make sure that the sashing strips align with the blocks.
Hopefully this is clear enough but let me know if you have any questions. I'd also love to see yours if you decide to make one....M
Kaaren provided a PDF of detailed instructions for how to sew a beautiful checkerboard quilt and then illustrated the steps with photos (I am soooo tempted...). She has also given rough fabric requirements. Mystery solved! So, here's my version of Danuta's Garden (aka The Civil War Quilt) given that the pattern is no longer available for purchase. There are no assembly illustrations but the blocks are very straightforward so hopefully the photos suffice and all of the essential details are covered.
Because I created the pattern from a photo and because I am making a scrappy version, the background fabric is the one that you will need the most of - I'm thinking maybe 4 metres. For the Four Patches, Nine Patches and Ohio Star blocks pull together a good mix of fat quarters - I'd say between 20 to 30. For the Four Patches I also raided my stash and scraps so there would be lots of variety.
I've mentioned before that, with the exception of the background, I started with the leftovers from the first version that I made with mom over 15 years ago and then added to that, focusing on floral prints, but you can choose whatever suits. My friend Linda is making hers in a gorgeous collection of soft blues, yellows and pinks.
Linda's sister Jane made her second version using Kaffe Fasset prints and called it Summer Frolic. I'll see if I can get a pic of the first one that she made - it's done in a green palette and equally beautiful.
For some reason when we made the first version we didn't go with a basic 3.5" block for the Nine Patches - my blocks are 3 1/8" so the Nine Patches and Ohio Stars are 8 3/8" unfinished. Feel free to use whatever size works for you but be prepared then to figure out the math for the pieces needed for the sashing strips. Also, I am using Ohio Star blocks for my corners instead of four different blocks as shown in the original pattern.
There are five basic blocks/pieces:
42 Nine Patches
- cut 9 squares 3 1/8" x 3 1/8", five in one colour and four in another; 378 3 1/8" squares in total
30 Ohio Stars
- cut four squares 3 1/8" x 3 1/8" from the background fabric for and corners of each block
- cut one square 3 1/8" x 3 1/8" from your second print
- for the star points, cut four 2 7/8" squares from your second print and cut them again on the diagonal to create eight triangles; make four 3 1/8" Hourglass units
30 Solid Sashing Strips for between the stars (8 3/8" x 3" unfinished)
347 Four Patches made from 1 3/8" squares (cut 1,388 squares 1 3/8" x 1 3/8")
Use the Four Patches to assemble two different lengths of sashing:
- 48 short sashing strips made from three Four Patches and four corner triangles, and
- 7 long sashing strips made from 29 Four Patches and four corner triangles
402 Setting and Corner triangles
- cut 2 7/8" squares from the background fabric and cut those on the diagonal; the corners are slightly larger than need be but will give you room to trim
So that's it. I'm not at the point yet where I am assembling blocks and sashing, but as I get there I'll gladly share pics for you. Also, because I am sewing this by hand I have a scant ¼” seam allowance so if you are sewing this on a machine you may want to do a set of test blocks to make sure that the sashing strips align with the blocks.
Hopefully this is clear enough but let me know if you have any questions. I'd also love to see yours if you decide to make one....M